Friday, March 25, 2016

Everyday Chicken Curry

I had few chicken pieces and exactly 30 minutes at hand to make a dinner for the family. And I just made the easiest chicken curry possibly that was liked by all. This is great for any weeknight dinner when you do not want anything elaborate and do not have many things at your disposal. 

Ingredients

Chicken - Half kg (1 lb), cut into pieces
Onions - 2 medium, chopped
Potatoes - 2 medium, cut into halves
Yogurt - 2 tablespoon
Cumin powder- 1 teaspoon
Coriander powder - 1 teaspoon
Cilantro - 1 small bunch
Garam Masala - 1 teaspoon (4 cardamoms, 2 cloves, 4 black peppers, a small piece of cinnamon)
Oil - 2 tablespoon, I used mustard oil
Salt -  To taste


Mix cumin and coriander powder with the yogurt and smear nicely on the chicken.

Heat oil in pan, add a red chili, and garam masala to it. Salute for a minute, and add the chopped onions. Salute till they are light golden in color.

Add the yogurt and spiced mixed chicken pieces, fry in oil along with onions, till the color changes from raw to nice brown.


Add the potatoes and fry a bit. (Yes, I always have potatoes n chicken curry, makes it extra yummy). 

Add salt to taste. Now add water to it, cover the pan and cook till it is almost done. 

Just before turning the heat off, add chopped cilantro, mix well and turn the heat off.


Tastes yummy when served with roti or white rice.


Enjoy!

Thursday, March 17, 2016

Pasta with Broccoli - Just 10 Minutes!

Back after a long time! But just in time when you need a recipe that takes negligible time to cook so that you can spend time with your lil one and survive this long summer holidays. I know sista. That's how my life is going on too.

Well, technically this recipe calls for more than 10 minutes, but that including the boiling time. This is packed with vegetable and cheese so very balanced and nutritional for your growing kiddo. I am sure you can use any veggies of your choice.

Ingredients

Broccoli - 1 small head, cut into bite size florets (minus stem)
Pasta - 1 cup of your choice, I used elbow in this
Cheese - 4 slices, you can use whatever you have, for shredded use about 1/2 cup
Garlic - 4 cloves
Salt - To taste
Pepper - 1/2 teaspoon


These days lil A (almost 5, not so lil any more) dismisses any kind of veggies being served to her. This makes this ever worried mamma paranoid, but luckily she is still loving broccoli. So I feed her this beauty as much as possible till the stars de-align and she stops loving it .


In a pot take enough water, add salt and bring it to boil. Add the pasta and the broccoli at the same time, and cook till al dente, say for about 6-8 minutes.


Reserve a cup of boiled pasta water, and drain the remaining. Heat 1 tablespoon of oil (you can use the same pot), and add the crushed garlic to it. When the garlic turns brown, add the pasta and broccoli to it. Mix well.

Add the shredded cheese, or tear the cheese slices and spread on it. Mix with a wooden spoon.

Add salt and freshly crushed pepper. Give it a mix.

Add the pasta water, mix it well and let it simmer for 2 minutes.

Cover the pan and turn off the heat.


Your delicious yet simple pasta with broccoli is ready.


Enjoy!

Saturday, February 27, 2016

Book Review: Ramayana The Game of Life: Stolen Hope Book 3

I know I have been absent from this space for quiet a long time. Life takes its own course and gets busy day after day. But, I am back, and back to review this wonderful book that I got in my mail. This is the third book of the Ramayana series by Shubha Villas. I already read the second book and I was thrilled to get an opportunity to review the third. Thank you BlogAdda.

This book starts with the story of King Danda and his reign over Dandakaranya. This part of the story was totally new to me and soon I was engrossed reading it. Shubha has this unique talent to weave the story nicely, and write it in a very simple yet enchanting way. The way the life of the brothers along with Sita is portrayed only speaks about the strength of the writer. It sums up in a nice way Rama's morality and honesty towards his parents, life, and people of kingdom, it shows Sita's faithfulness, endurance and her love for her family. Ramayana in general plays an important role not only in Indian literature but also in Indian society. It depicts the story of an ideal kingdom with perfect relationships, and talks about ideal characters like the ideal father, son, brother and wife. Ramayana has been translated in various languages all over India.

Shubha has very nicely given us a taste of the hope and desolation, praise and trickery that goes on in a royal family.What I like about the book, is the analogy the writer brings with the modern day life situations and explains it in todays perception. Also, I felt the book dealt with the characters in a more humanly manner and thus one can relate to the emotions and pain of the characters. The writer truly did a wonderful job in depicting this thrilling and complicated family drama. The book ends with Sita been taken away by Ravana to Ashoka vatika, and Lakshmana's diary. It nicely says about Rama's emotion and grief on losing Sita. The picture of Asoka vatika and Lanka has also been depicted nicely. The book gives an account of Sita's feelings, emotions and thought when she was placed in Ashoka vatika. It also shows her strength in the way she spoke to Ravana.
Overall the book is nicely written and makes for a very good read with easy explanation and lucid way of story telling.                              


This review is a part of the biggest Book Review Program from Blogadda. Participate to get free books today!

Monday, August 10, 2015

Prawn Cauliflower Curry

My lil one loves prawns. Quite often she demands for "chingri" and wants to eat it "sudhu sudhu", which means only prawns and nothing else. Last Saturday was very busy which included a parents-teacher meeting at lil A's school and running errands. Initially we thought of eating lunch outside, but for some reasons I was craving some homemade nice curry. I peeked in the vegetable box and saw one small cauliflower sitting to be used. I thought of doing a plain and simple cauliflower curry but then remembered about this curry and got excited. I have not made this in ages, don't know why, so made this with full eagerness. And it turned out to be really good. I like the light, little watery version of this curry and enjoyed it with a warm white rice. Life is good! 


Ingredients

Cauliflower - 1 small head
Prawns - 6-8 large/12-14 small or whatever you like
Potato - 1 medium, diced
Onions - One medium, sliced fine, 1 small made to paste
Ginger - 1/2 inch, made to paste
Garlic - 2-4 cloves, made to paste
Cinnamon - 1/2 inch stick
Cardamoms - 3-4
Cloves - 2-3
Red chilli - 1
Green chilli - 2, or as many as you like
Turmeric - 1/2 teaspoon
Cumin powder - 1 teaspoon
Salt to taste
Oil - 4 tablespoon (I used mustard oil)


I cut the cauliflower into medium sized florets and smeared with salt and turmeric. The potato was diced. Both prawns and potatoes were smeared with salt and turmeric too. 

(Tips: I cut the cauliflower and keep it submerged for 10-15 minutes in highly salted water, it cleans the vegetable from any insects hidden inside).


Next I fried the florets in hot oil, till they were slightly browned. Next in the remaining oil, saute the prawns till the color changes. remove and place on the kitchen paper.


In the remaining oil (add more oil if required), add red chilli, cardamoms, cloves and cinnamon and saute for a minute or two. Add the sliced onions to it and fry it till they are translucent. Add the onion paste to it and fry it well. 

Next add garlic and ginger paste and mix well. Add salt, turmeric and cumin powder. Add the florets and potatoes to it and give it a nice mix for few minutes.

Once the potatoes and florets are well mixed with spices, add the prawns, green chillies, and add 1/2 cup of warm water to it. If you want it more watery, add more water. Cover it and simmer for few more minutes.

Check to see if all are cooked well and the soup becomes little thick in nature. Add a spoonful of "ghee" or clarified butter to it.


Serve with warm rice. 
Sorry, I was in hurry and could not take many pics.


Enjoy!


Sunday, July 19, 2015

Easy Eggless Semolina Cake

This is a supereasy to make and very comforting semolina cake. I had a version of this cake way back at a friend's home. I was craving to have some cake that goes well with tea or coffee but was not in a mood for anything elaborate. Searching in the internet, I came across basbousa, a Mediterranean semolina cake and thought it might be interesting. I am glad that I gave it a try this weekend and was extremely happy with the cake. It is bit higher on the calorie side but then again indulgence is allowed once in a while.

Ingredients

(This is for my 7 inch pan)

Semolina - 1 cup
Sugar - 1/4 cup (It was mildly sweet which we like, you can increase the sugar to 1/2 cup)
Yogurt - 1/2 cup
Milk - 1/2 cup (Whole or skim)
Butter - 2 tablespoon (soft)
Raisins- Fistful (optional)
Almonds - 5-6, to garnish

For syrup

Water - 1/2 cup
Sugar - 1/2 cup
Cinnamon - 1 inch
Cardamom - 3/4 pieces


Dry roast the semolina for 5-7 minutes. Be careful not to burn it.


In a bowl, mix the sugar with yogurt well. Add milk to it and stir it again. Now add the roasted semolina to it and mix it well. If it is too tight, you can add 2 more tablespoon of milk.


Add the butter to it and set aside for few minutes so that the butter is nicely absorbed. Add the raisins to the mixture.

Pre heat the oven at 180C.

In the meantime, add water and sugar for the syrup in a pot and bring it to boil. Add the cardamoms and cinnamon.


Once the sugar is melted, lower the heat and let it simmer for 10-15 minutes till the syrup is thick.


Transfer the semolina mix into a greased pan and bake it for 25-35 minutes.In the meantime chop the almonds.

Last 5-7 minutes I have broiled the cake to give it a nice color on the top. Once done (test with a fork, when inserted it should come out clean), take it out carefully, and make some slits on it with a knife.


Pour the syrup on the warm cake and garnish with slivered almonds.


Have a piece as it is or with your afternoon tea.


Enjoy!

Tuesday, June 23, 2015

Mango Bread Pudding

Its summer!!!!! With all the heat and humidity I love this season and one of the major reason for it are mangoes. Yep, rightly called the "King of Fruits". Right now, we are eating tons of it, and everyday.We were not fast enough and some of them were ripened a little too much. So thinking of how to use them apart from using it in a smoothie, we thought of using it in a bread pudding. At our household we quite often make bread pudding so were extremely eager to try this new version. And with starting of school, it can serve the purpose of a very healthy after school snack.


Ingredients

Mangoes - 2 cups (cut in bite size pieces, you can use less or more)
Bread - 4-5 pieces (torn in bite size pieces)
Whole Milk - 3/4 cup
Egg - 1
Sugar - 1/4 cup (you can use more according to the taste)
Raisins - Handful
Vanilla - Few drops
Butter - 1/2 teaspoon


Tear up the bread into pieces and keep in a bowl Cut the mangoes in bite size pieces, cut it on a plate to reserve all the juices that come out. 


Mix the mango pieces and juice with breads and set aside for few minutes.


In a separate bol, mix together milk, egg, sugar and vanilla. Add a pinch of rock salt/common salt to it.


Grease the baking tray with the butter. I used a 9 inch square baking tray. 

Add the bread/mango mixture to it. Pour the milk mixed with egg and sugar.

Add the raisins on top of it.

Bake in the oven at 180 C/300F for 25- 30 minutes. If you want it a little darker, you can bake it for longer time.


Chill it in the refridgerator for 30 minutes. You can have it as it is or serve it with vanilla ice cream.

Enjoy!

Wednesday, April 29, 2015

Zucchini Noodles aka Zoodles (Without Spiralizer)-Easy and Healthy Lunch

I know it has been too long that I posted here but trust me, this space is always in my mind. And I feel bad for my absence here. But life is getting busy with other responsibilities and with summer here, there are so many activities already in my calendar. Anyways, I will try my best to keep this space alive.

Okay, "zoodles" or "zasta", however you call them. They are viral all over the internet and caught my fancy the first day I saw them. These are noodles or pasta made from zucchini. Sounds weird, right? But they are yummy for your mouth and waist line. So what took me so long to post this? Well, I was trying to get the right tool, a spiralizer, to make the "zoodles" as shown in thousands other blogs. But unfortunately, there are not too many good options available to me to buy from. Also, I hate a kitchen appliance that is not used regularly, or is not multi functional and thus I am not still sure whether I want to invest in it or not.

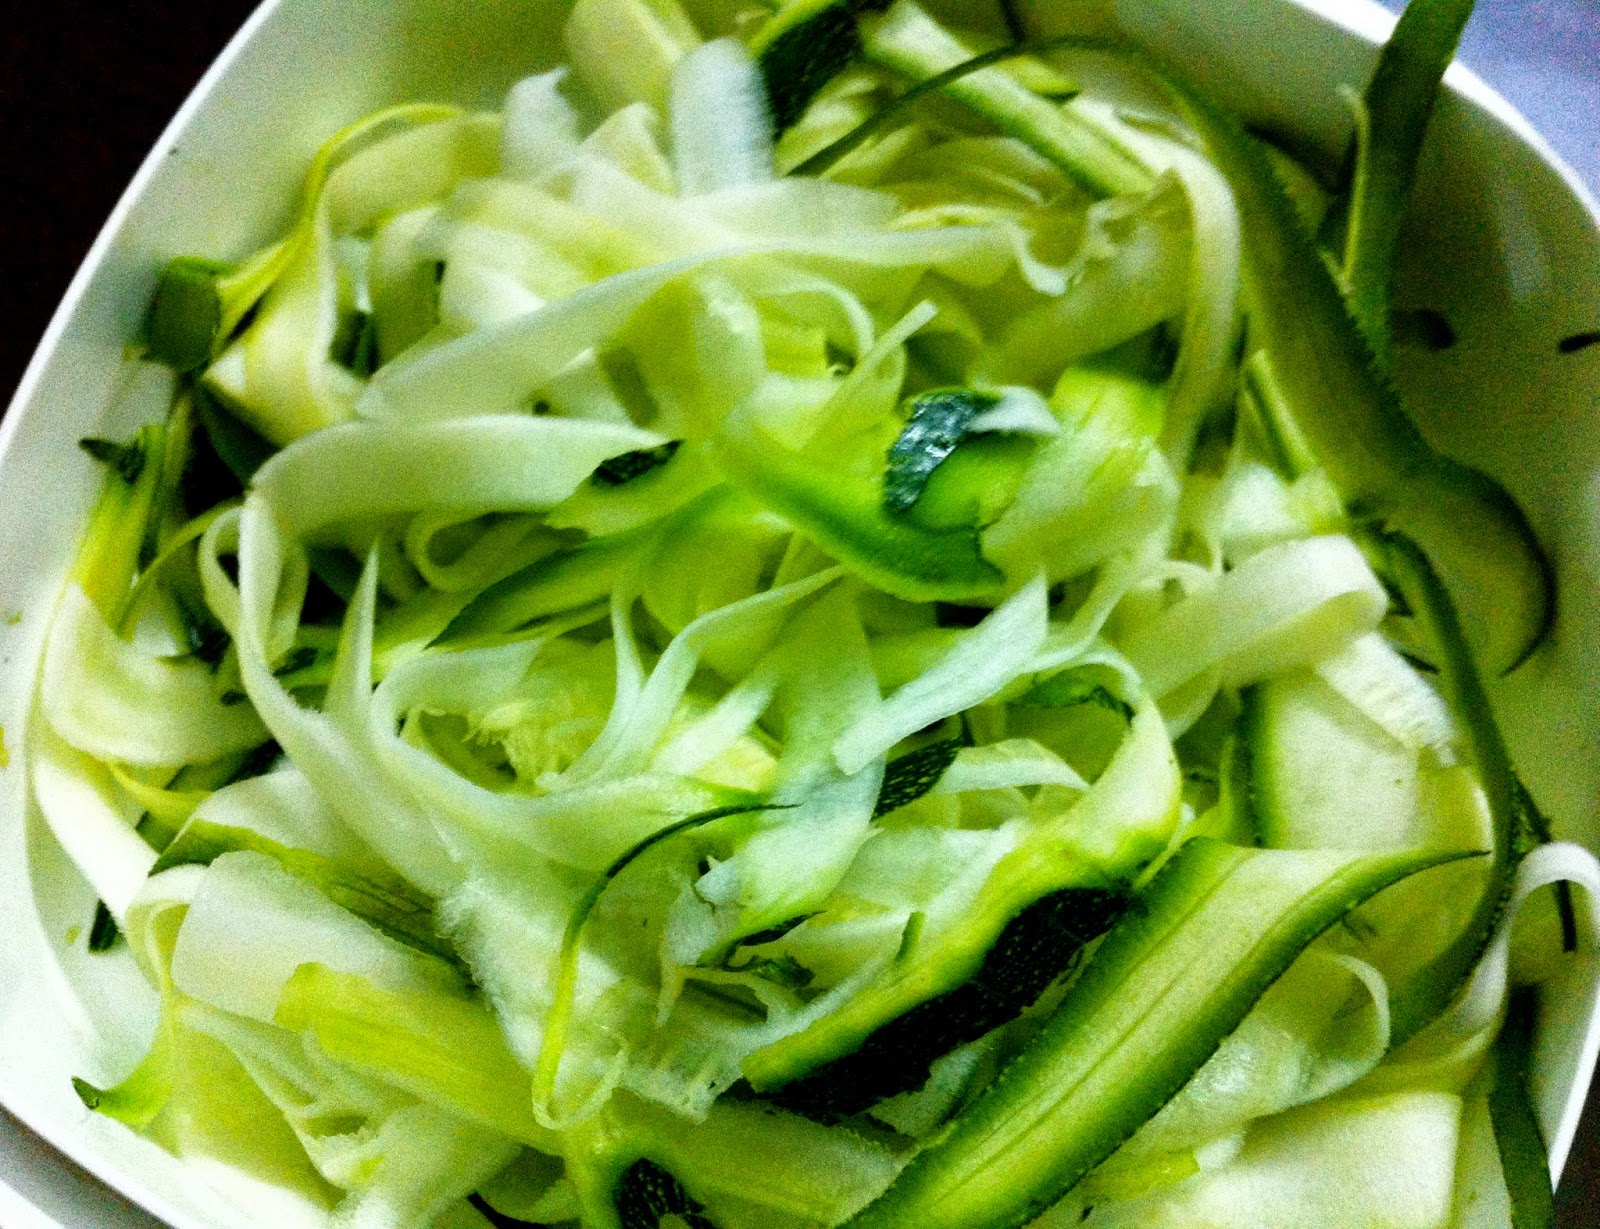
So however I was eager to try it, I kept myself holding back. Then one day I said, enough is enough, and tried my good old veggie peeler to make ribbons of the zucchini I had in my kitchen. So technically these are not "noodles" but more like "ribbons", but that does not make it less tasty at all. And since I started doing it, I am not stopping at all. In the past ten days, I had this "zasta" or zucchini pasta, for six days. There is no need for me to tell that these are super healthy, but also they are easy to make and tasty, which is really important for me.

Ingredients:

Zuchhini - 1 largish (I peeled them using my veggie peeler and left the skin on)
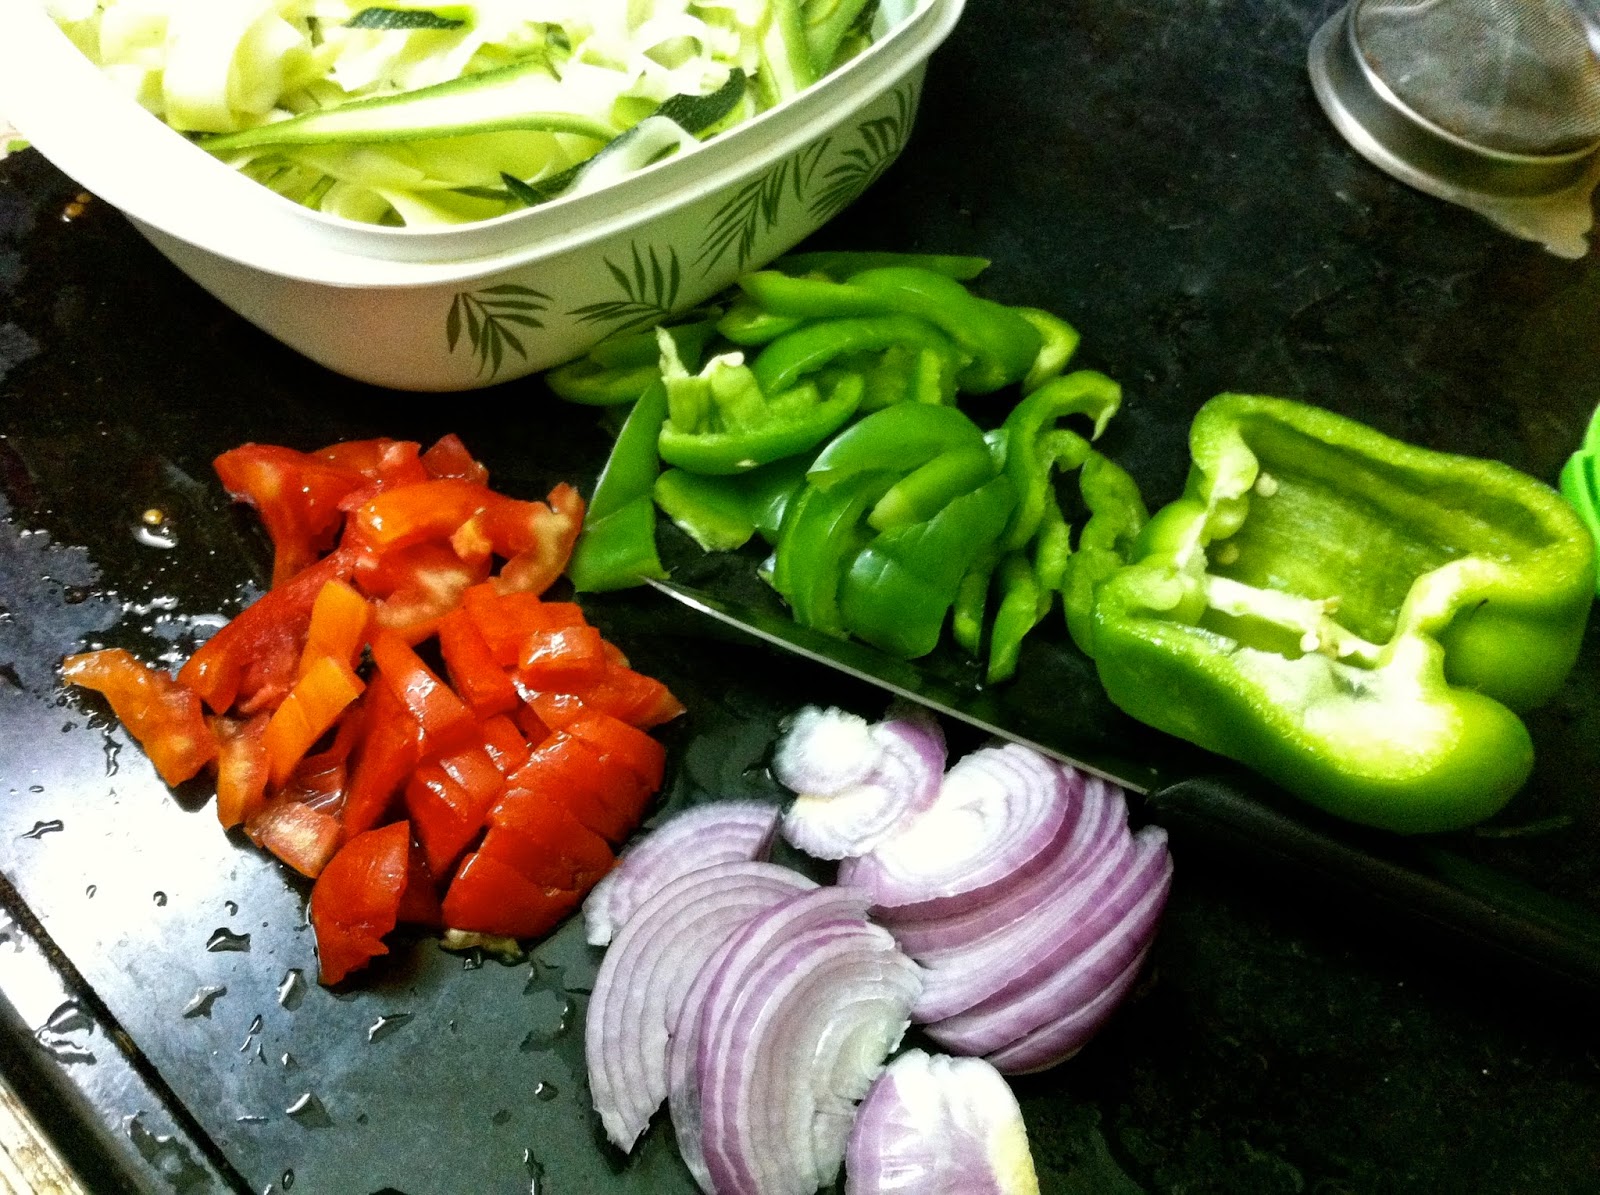
Oninon - 1 red medium, sliced
Tomato - 1 medium, chopped fine 
Green pepper - 1 medium, sliced thin
Oil - 1/2 tablespoon
Salt - to taste
Pepper - to taste
Mozarella - 1/4 cup, grated (optional)


I medium zucchini serves as one serving. Peel them (you can use the spiralizer, or julienne peeler if you have one) in long ribbons till you reach the core with seeds.


Cut your veggies as you like and keep aside.


Heat oil in a pan, add the onions and sauté till soft and translucent. Add the tomatoes and green pepper to it.


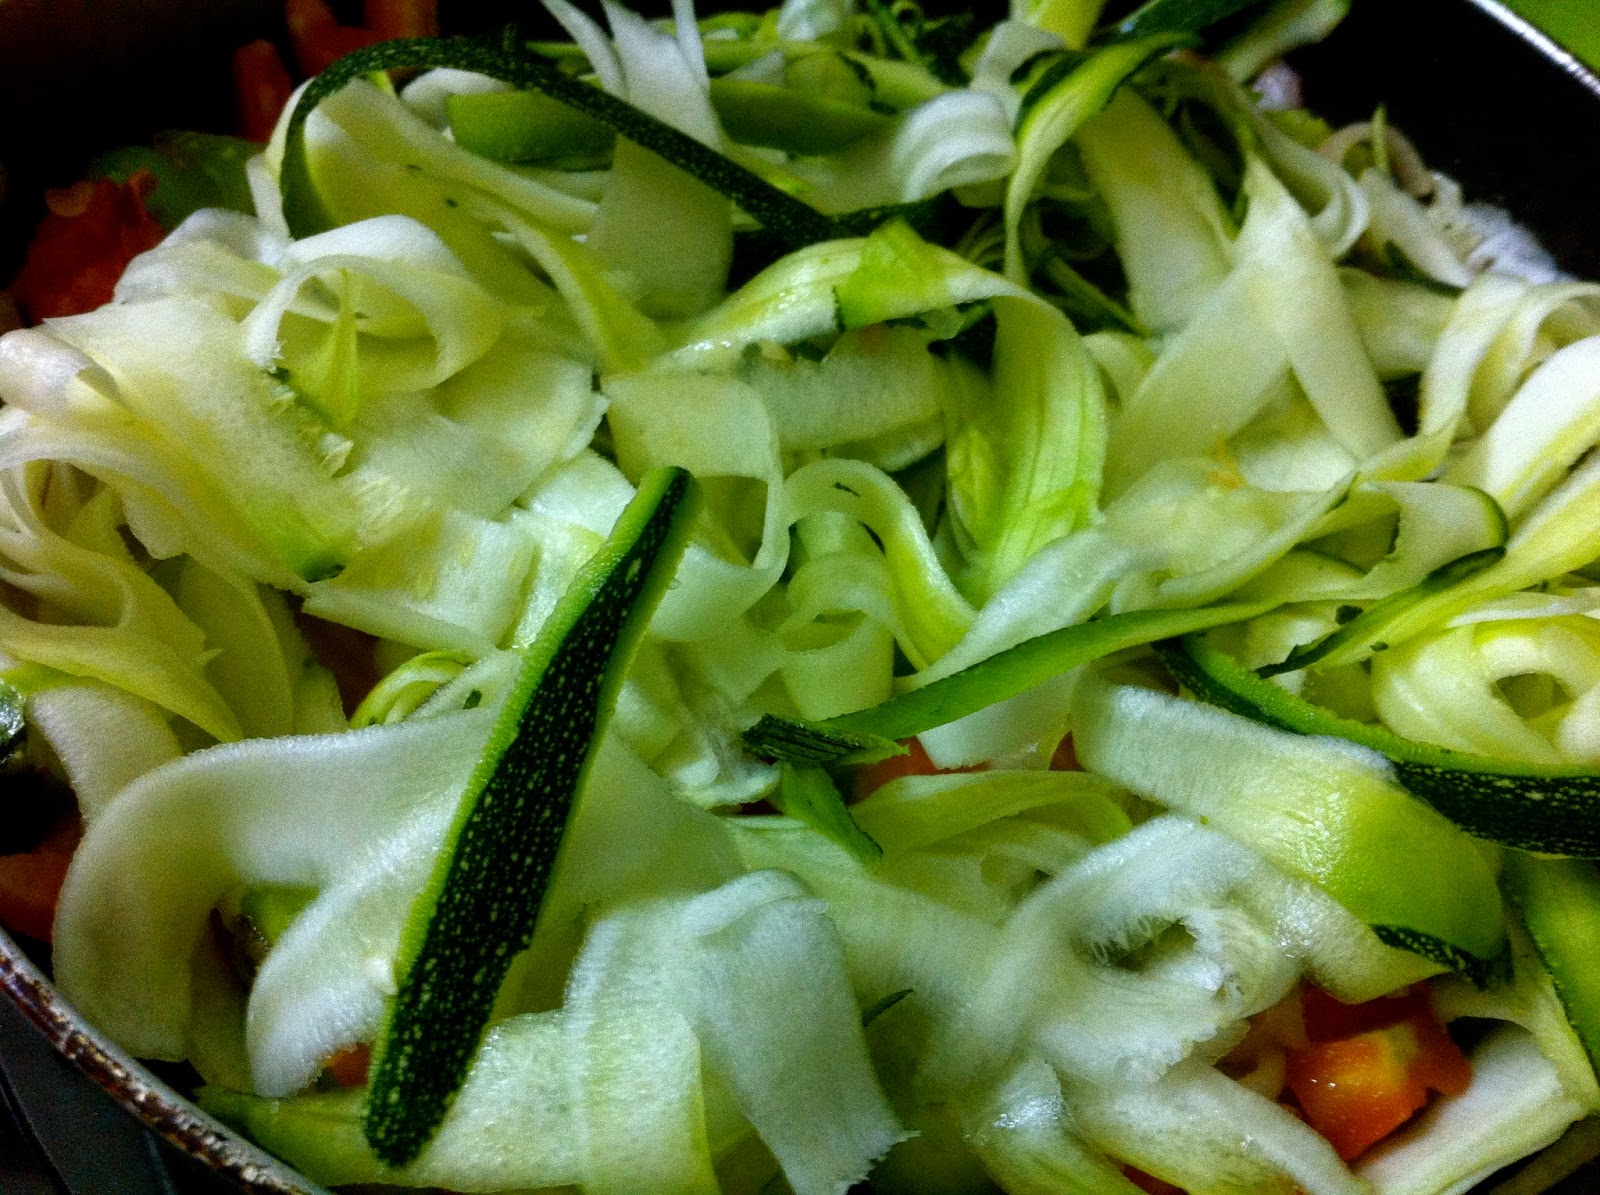
Add the zucchini ribbons to it and stir on high heat. Add salt and crushed pepper. Stir fast on high heat for few inures till the zucchini is cooked. Be careful not to burn it. Adding salt will release water so cooking in high heat prevents the zucchini from being too soggy.


Ready! Enjoy your pasta with out the carb load.


You can eat this at this stage or go to the next step, which I am very fond of. 


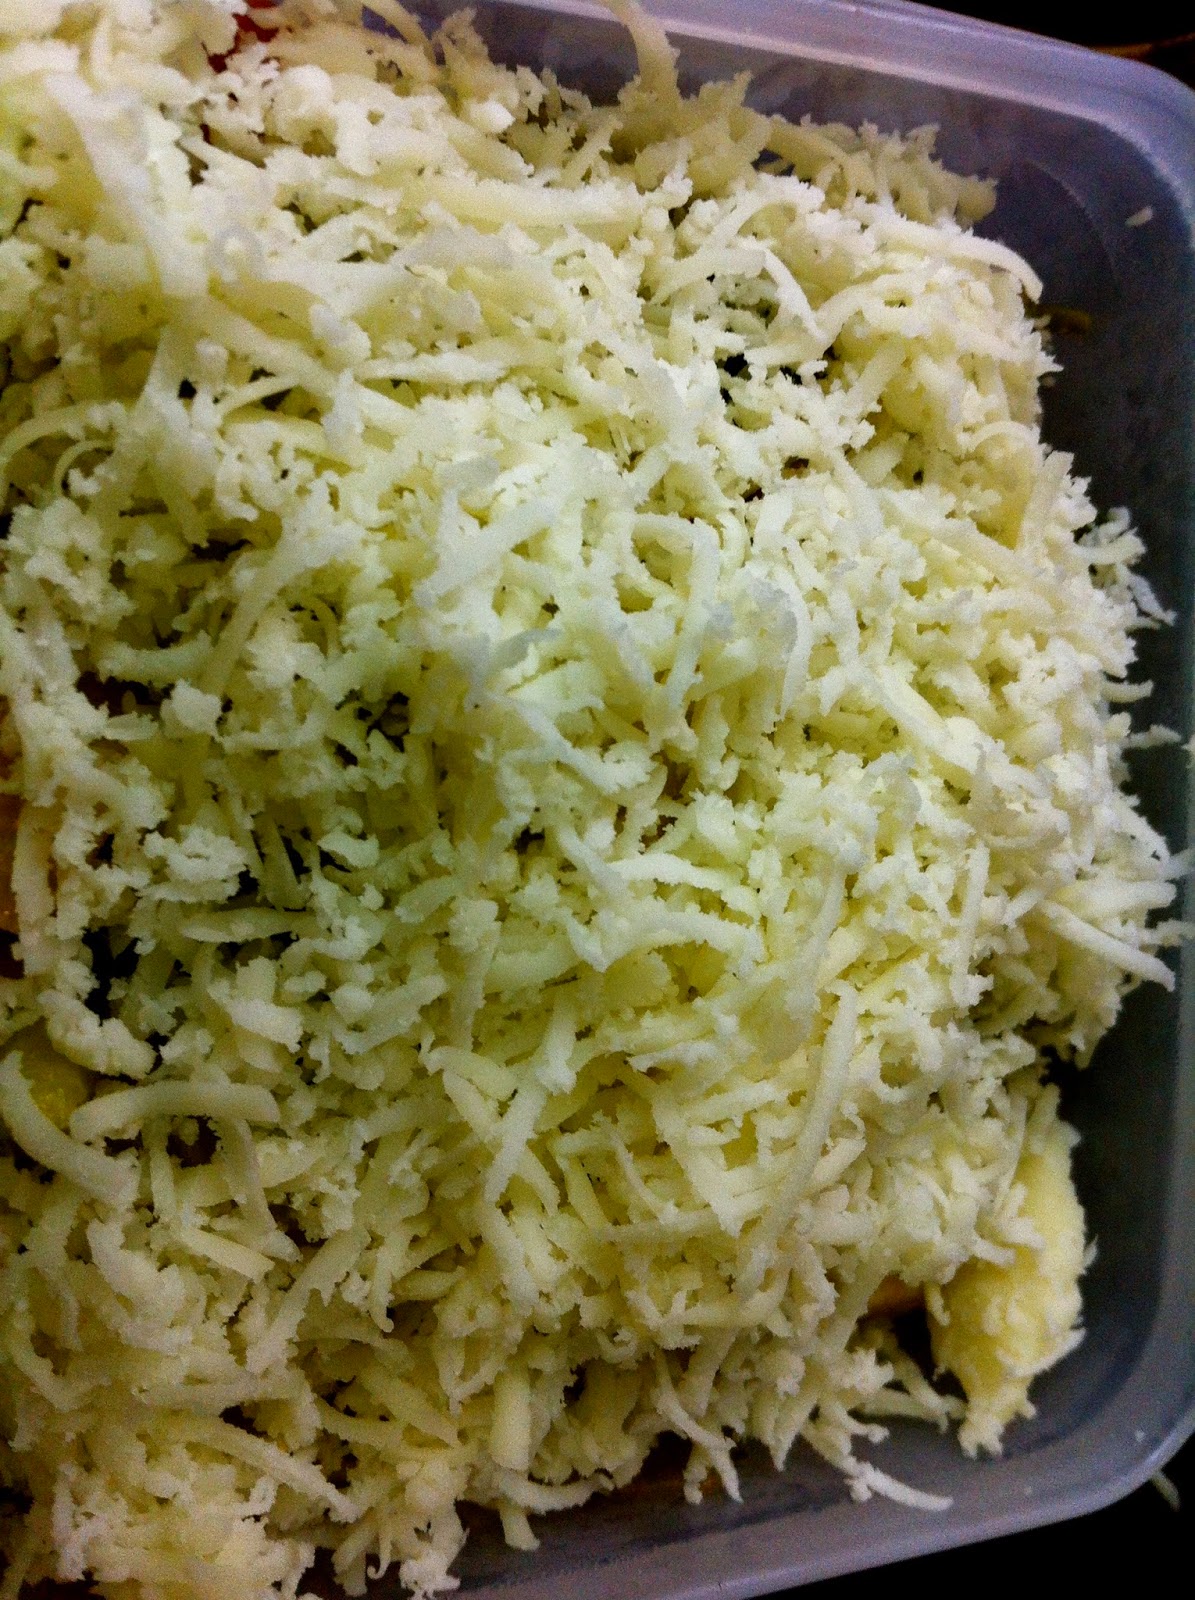
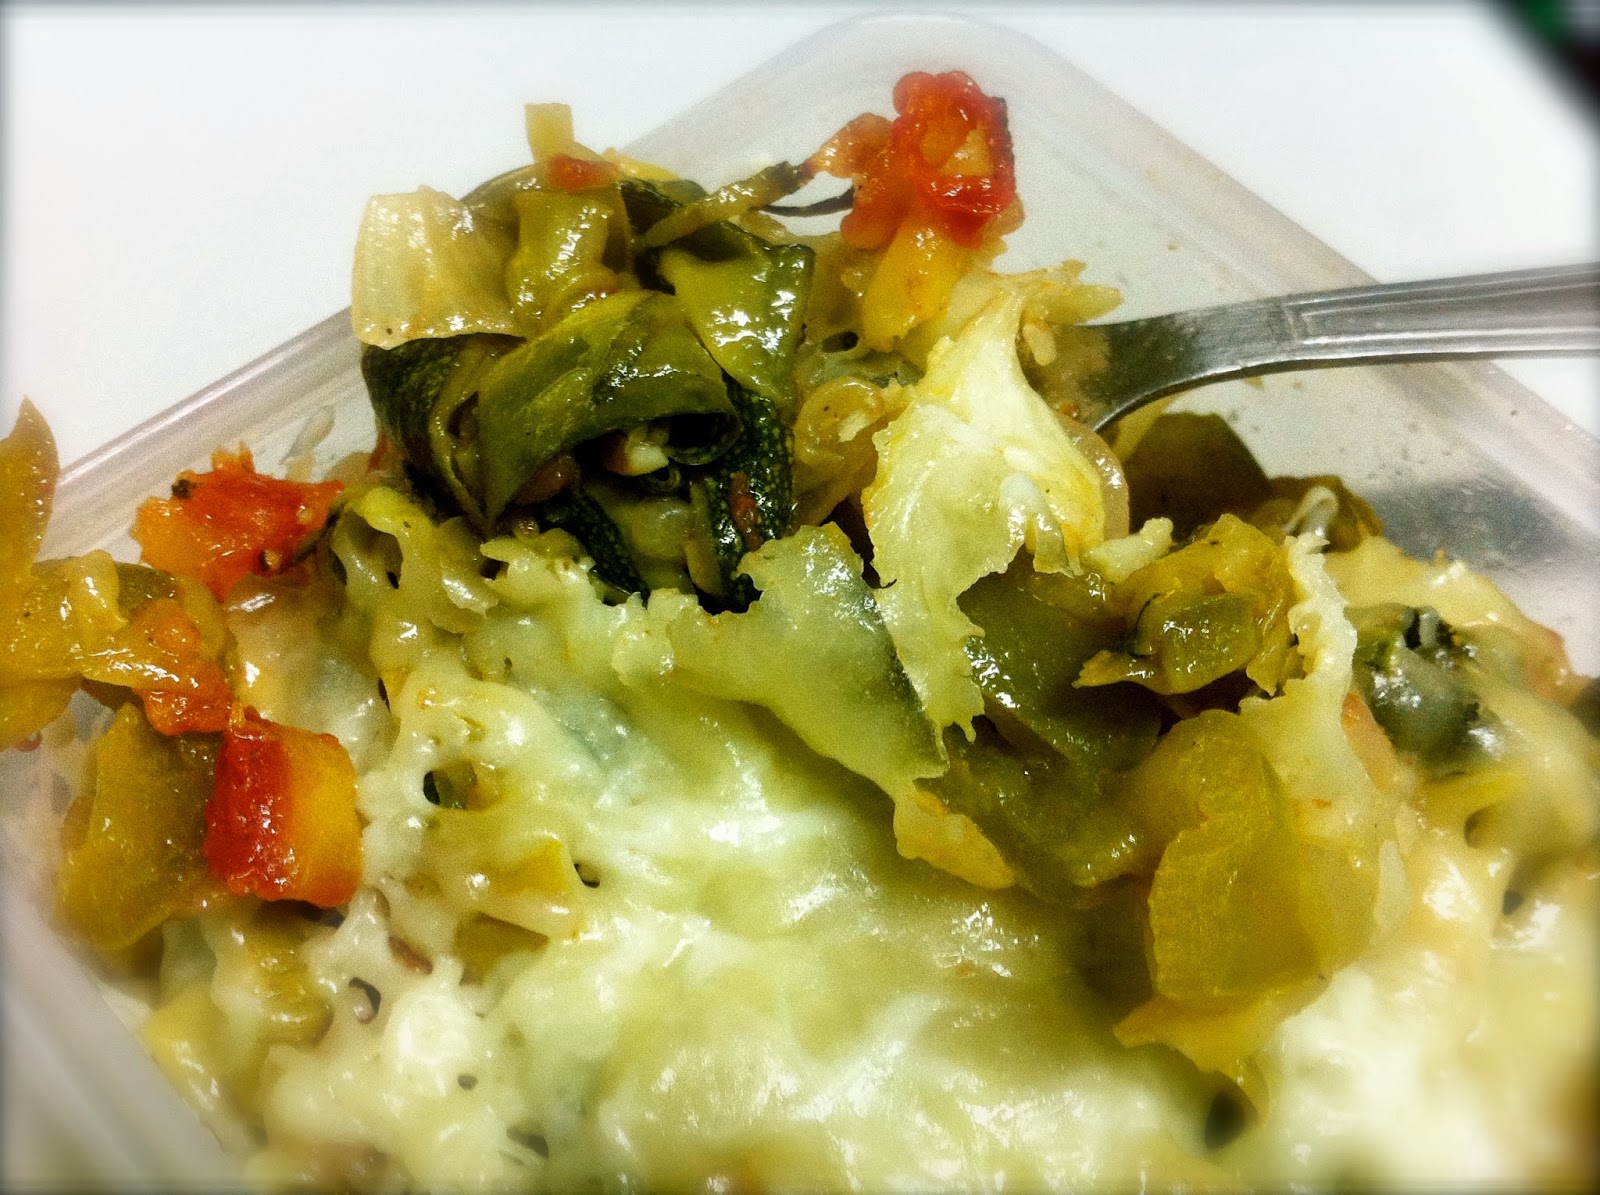
Transfer it to a oven safe dish. Add grated cheese (I used mozzarella, use whatever you have), and bake for 3-5 minutes, or till the cheese has melted well. 


Yummy! It even tastes and smells like pizza to me.  (I am drooling while editing this post, ughh)

Quick tip: You can also microwave the cheese until melted, it may not have the crusty top, but is delicious in its own away.


Enjoy!